はじめに
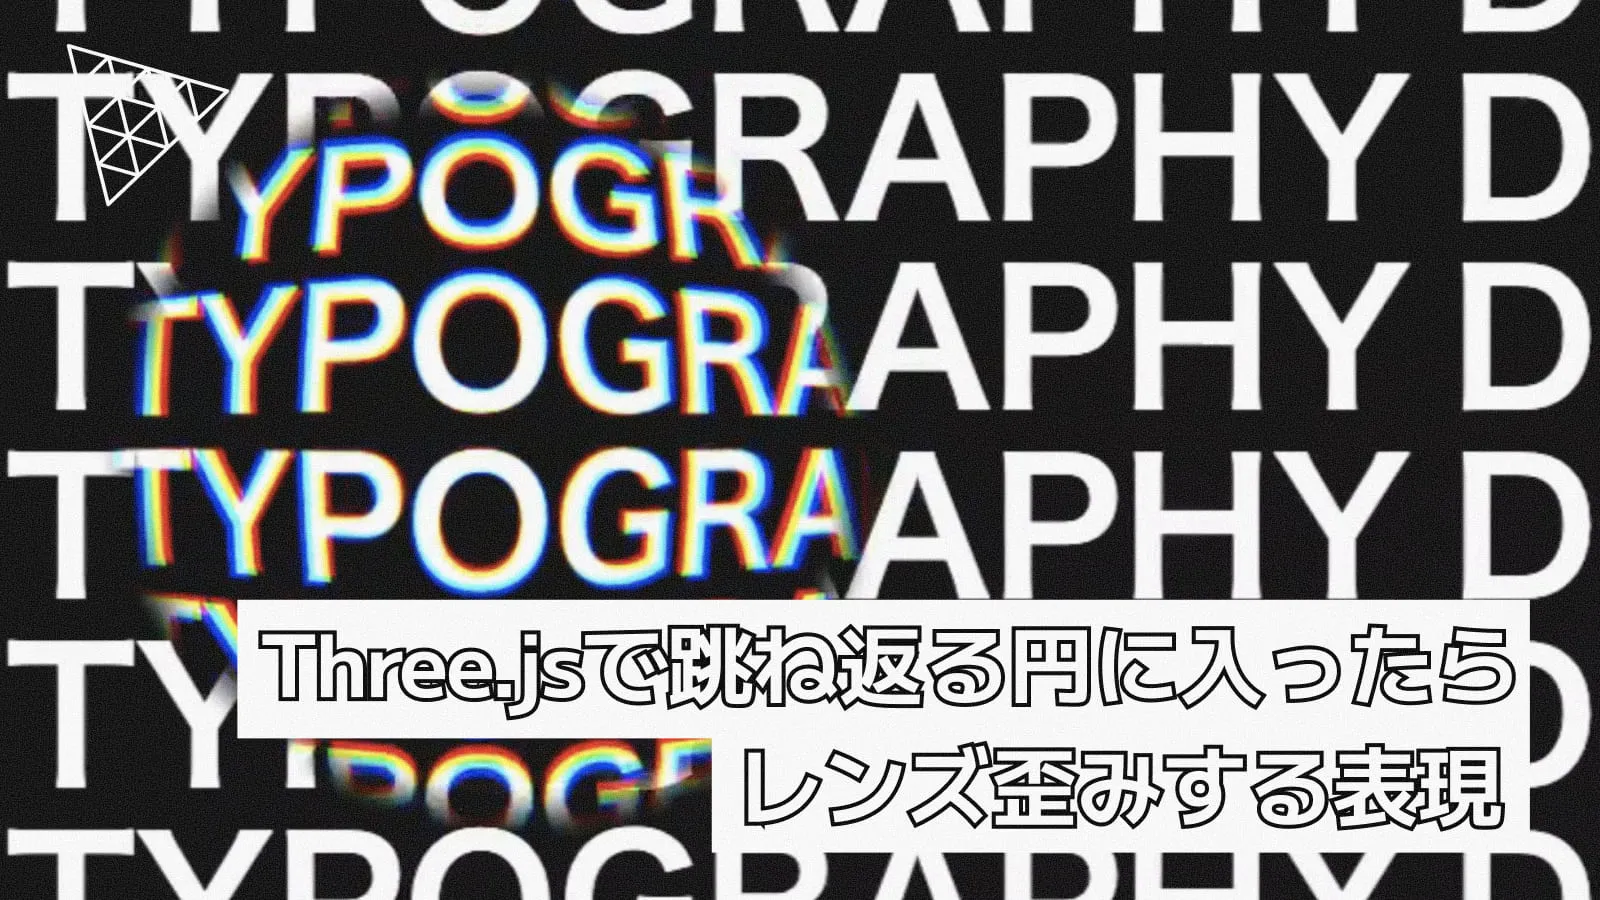
跳ね返る円の中に入ると、テキストがレンズ歪みする表現#threejs #glsl pic.twitter.com/gzq7lSlvg6
— かめのの (@kameno_no3) September 8, 2026
今回は、Three.jsで跳ね返る円の中に入ったらテキストをレンズ歪みさせる表現の作り方を解説します。今回も板ポリ1枚の表現となります。Three.jsでのテキストの無限ループの動きや、円に入ってからのシェーダーの表現、レンズ歪みなど参考になればと思います。
Three.jsの開発環境は以前の記事を参考にしてください。
この記事のデモのコードは以下のGitHubリポジトリにあるので、ぜひ参考にしてください。
実装の考え方
今回の実装の考え方は以下の通りです。
- オフスクリーンCanvasでテキストテクスチャを作成し画面全面に敷き詰める
- 跳ね返る円の制御はJavaScript側で行う
- テキストテクスチャの無限ループの動きはフラグメントシェーダーで実装する
- 円に入った際のレンズ歪みはフラグメントシェーダーで実装する
それでは、最初にオフスクリーンCanvasでテキストテクスチャを作成し、画面全体に敷き詰めることから始めましょう!
テキストテクスチャーを画面全体に敷き詰める
テキストはオフスクリーンCanvasで描画し、THREE.CanvasTextureを使ってテクスチャ化します。また、画面全体に敷き詰めるように位置を配置します。テキストテクスチャを生成するcreateTextTextureメソッドを作成し、そこでオフスクリーンCanvasの初期化とテクスチャ化を行います。
private createTextTexture(width: number, height: number): THREE.CanvasTexture {
const canvas = document.createElement('canvas');
canvas.width = width;
canvas.height = height;
const ctx = canvas.getContext('2d') as CanvasRenderingContext2D;
ctx.fillStyle = '#0a0a0a';
ctx.fillRect(0, 0, width, height);
ctx.fillStyle = 'white';
ctx.font = 'bold 80px sans-serif';
ctx.textAlign = 'left';
ctx.textBaseline = 'middle';
const text = 'DISTORTION TYPOGRAPHY';
// 文字の幅を計測し、繰り返し描画の間隔を決定する
const textWidth = ctx.measureText(text).width;
const gap = 40;
const step = textWidth + gap;
const lineHeight = 90;
// 画面全体に文字を繰り返し描画する
for (let row = 0, y = lineHeight / 2; y < height; row++, y += lineHeight) {
// 偶数行・奇数行で描画位置をずらす
const offset = row % 2 === 0 ? 0 : -step / 2;
for (let x = offset; x < width + step; x += step) {
ctx.fillText(text, x, y);
}
}
// 生成したCanvasをThree.jsのテクスチャに変換
const texture = new THREE.CanvasTexture(canvas);
// 画面外にはみ出した際に繰り返して描画されるように設定
texture.wrapS = THREE.RepeatWrapping;
texture.wrapT = THREE.RepeatWrapping;
return texture;
}テキストを画面全体に敷き詰めるために、measureTextで文字の幅を計測します。次の文字が詰まらないように間隔(gap)も設定しておきます。敷き詰めてテキストを描画するロジックは下記のforループ部分です。
// 画面全体に文字を繰り返し描画する
for (let row = 0, y = lineHeight / 2; y < height; row++, y += lineHeight) {
// 偶数行・奇数行で描画位置をずらす
const offset = row % 2 === 0 ? 0 : -step / 2;
for (let x = offset; x < width + step; x += step) {
ctx.fillText(text, x, y);
}
}すべての文字が揃わないように、偶数行と奇数行の描画位置をずらす処理も入れております。
作成したCanvasはTHREE.CanvasTextureを使ってテクスチャ化され、Three.jsのマテリアルに適用することで画面全体に敷き詰められたテキストとして表示されます。
wrapSとwrapTのTHREE.RepeatWrappingの設定は、テクスチャが画面外にはみ出した際に繰り返して描画されるようになる設定です。
それでは、このテクスチャをThree.jsのマテリアルに適用しましょう。
createGeometryメソッドでこの処理を行います。
private createGeometry() {
const width = window.innerWidth;
const height = window.innerHeight;
const textTexture = this.createTextTexture(width, height);
const geometry = new THREE.PlaneGeometry(2, 2);
const material = new THREE.ShaderMaterial({
vertexShader: vertex,
fragmentShader: fragment,
depthWrite: false,
depthTest: false,
uniforms: {
uTexture: { value: textTexture },
uResolution: { value: new THREE.Vector2(width, height) },
uCirclePos: { value: new THREE.Vector2(0, 0) },
uCircleRadius: { value: this.circleRadius },
uLensDistortion: { value: -1.8 },
uTime: { value: 0 },
},
});
this.mesh = new THREE.Mesh(geometry, material);
this.scene.add(this.mesh);
}このデモでのuniform変数の役割は次のようになります。
| uniform | 役割 |
|---|---|
| uTexture | テキストテクスチャ |
| uResolution | 画面の解像度 |
| uCirclePos | 円の位置 |
| uCircleRadius | 円の半径 |
| uLensDistortion | レンズ歪みの強さ |
| uTime | 経過時間 |
それでは、円に関してのuniform変数の初期化と制御方法についてみていきましょう。
JavaScript側での円の制御
まず最初に円の初期位置と速度、半径を設定します。
export class App extends Three {
// ...
private circlePos!: THREE.Vector2;
private circleVelocity!: THREE.Vector2;
private circleRadius = 180.0;
constructor(canvas: HTMLCanvasElement) {
// ...
// 円の初期位置と速度を設定
this.circlePos = new THREE.Vector2(
window.innerWidth / 2,
window.innerHeight / 2
);
this.circleVelocity = new THREE.Vector2(
(Math.random() - 0.5 ? 1 : -1) * (3 + Math.random() * 4),
(Math.random() - 0.5 ? 1 : -1) * (3 + Math.random() * 4),
);
this.init();
window.addEventListener('resize', this.resize.bind(this));
this.renderer.setAnimationLoop(this.animate.bind(this));
}
}初期位置と速度はTHREE.Vector2で設定しています。初期位置は画面の中央に設定し、速度はランダムに設定しています。円の半径はcircleRadiusになり、今回は180として設定しています。
それでは、円の跳ね返り処理を見ていきましょう。updateCircleメソッドで実装しています。
// 円の跳ね返り処理
private updateCircle() {
const width = window.innerWidth;
const height = window.innerHeight;
this.circlePos.add(this.circleVelocity);
if (this.circlePos.x - this.circleRadius < 0) {
this.circlePos.x = this.circleRadius;
this.circleVelocity.x *= -1;
} else if (this.circlePos.x + this.circleRadius > width) {
this.circlePos.x = width - this.circleRadius;
this.circleVelocity.x *= -1;
}
if (this.circlePos.y - this.circleRadius < 0) {
this.circlePos.y = this.circleRadius;
this.circleVelocity.y *= -1;
} else if (this.circlePos.y + this.circleRadius > height) {
this.circlePos.y = height - this.circleRadius;
this.circleVelocity.y *= -1;
}
}円の位置(circlePos)に速度(circleVelocity)を加算して、円を動かします。諸々の条件式は、画面外になった場合に、速度を反転して跳ね返る処理を行っています。
updateCircleはアニメーションループで呼び出します。
private animate() {
const elapsedTime = this.clock.getElapsedTime();
this.updateCircle();
const meshMaterial = this.mesh.material as THREE.ShaderMaterial;
// WebGLの座標系に変換 (y軸が上下逆)
const shaderY = window.innerHeight - this.circlePos.y;
meshMaterial.uniforms.uCirclePos?.value.set(this.circlePos.x, shaderY);
if (meshMaterial.uniforms.uTime) {
meshMaterial.uniforms.uTime.value = elapsedTime;
}
this.renderer.render(this.scene, this.camera);
}同時に、uCirclePosやuTimeも更新してシェーダーに渡します。JavaScript側の準備は終わったので、次はシェーダー側でこれらの値を使ってレンズ歪みの効果を実装していきます。
テキストテクスチャーの無限ループの動き
まずはフラグメントシェーダーでテキストを無限ループさせる方法を見ていきましょう。
varying vec2 vUv;
uniform sampler2D uTexture;
uniform vec2 uResolution;
uniform float uTime;
// テキストを無限ループさせるUV座標を取得する関数
vec2 getTextUv(vec2 screenUv) {
vec2 pixelCoord = screenUv * uResolution;
vec2 texCoord = pixelCoord / uResolution;
texCoord.x += uTime * 0.08;
return texCoord;
}
void main() {
vec2 uv = vUv;
vec2 textUv = getTextUv(uv);
vec4 color = texture2D(uTexture, textUv);
gl_FragColor = color;
}実装の考え方としては、x座標を時間に応じてシフトさせることで、テキストが無限ループで流れるように見せられます。THREE.RepeatWrappingが効いているのでuv座標を動かしているだけですね。
続いては円に入った際のレンズ歪みの実装方法を見ていきます。
円に入った際のレンズ歪み
まずは、レンズ歪みの関数を定義していきます。
varying vec2 vUv;
uniform sampler2D uTexture;
uniform vec2 uResolution;
uniform vec2 uCirclePos;
uniform float uCircleRadius;
uniform float uLensDistortion;
uniform float uTime;
// レンズ歪みのスケールを計算する関数
float getLensScale(float distortion, float radius) {
if (distortion >= 0.0) {
return 1.0 + distortion * radius;
}
return 1.0 / (1.0 - distortion * radius);
}
// レンズ歪みを適用したUV座標を取得する関数
vec2 getLensUv(vec2 uv, vec2 resolution, float distortion) {
vec2 centeredUv = uv - 0.5; // 中心を原点としたUV座標に変換
vec2 aspectScale = vec2(resolution.x / resolution.y, 1.0);
vec2 centeredPosition = centeredUv * aspectScale;
float radius = dot(centeredPosition, centeredPosition);
float lensScale = getLensScale(distortion, radius);
vec2 distoredPosition = centeredPosition * lensScale;
vec2 distoredCenteredUv = distoredPosition / aspectScale;
vec2 distoredUv = distoredCenteredUv + 0.5; // uv空間(0.0〜1.0)に戻す
vec2 distortionOffset = distoredUv - uv;
return uv - distortionOffset;
}getLensUvはレンズ歪みを適用したUV座標を取得する関数になります。最初に0.5を引くことで、UV座標の中心を原点に移動させ、歪みの計算を行いやすくしています。
円の半径はdotを使用して計算し、これをgetLensScaleに渡すことで、歪みのスケールを取得しています。今回、歪みの値は-1.8と設定しているので、getLensScaleでは次の計算式に従って、歪みのスケールを決定しています。
1.0 / (1.0 - distortion * radius)この計算により、中心付近では歪みが小さく、中心から離れるほど歪みが大きくなるレンズ歪み効果が得られます。このlensScaleを用いて、UV座標を変換することで、テクスチャにレンズ歪みを適用しています。
円の中にあるか判定
円の中にあるかどうかを判定するには、円の中心からの距離を計算し、それが円の半径以下であれば円の中にあると判断できます。GLSLでは次のように実装できます。
void main() {
vec2 uv = vUv;
vec2 aspect = vec2(uResolution.x / uResolution.y, 1.0);
// ピクセル単位の座標と、円の中心からの相対座標
vec2 pixelCoord = uv * uResolution;
vec2 relPos = pixelCoord - uCirclePos;
// 円の中心からの距離
float dist = length(relPos);
// 半径で正規化
float maskDist = dist / uCircleRadius;
if (maskDist < 1.0) {
// 円の中にある場合の処理
} else {
// 円の外にある場合の処理
vec4 color = texture2D(uTexture, getTextUv(uv));
gl_FragColor = color;
}
}maskDist < 1.0の場合は円の中になるので、この条件内でレンズ歪みの処理を書きます。円の外にある場合は、先ほど作成したテキストを無限ループで動かすgetTextUvでuv座標を取得し、テクスチャをサンプリングしています。
円の中の条件でのレンズ歪みの実装は次のようになります。
if (maskDist < 1.0) {
// 円の中心をアスペクト比に合わせる
vec2 circleUvAspect = (uCirclePos / uResolution) * aspect;
vec2 uvAspect = uv * aspect;
// 中心が0.5になるように変換
float normalizedRadius = uCircleRadius / uResolution.y;
vec2 localUv = (uvAspect - circleUvAspect) / (normalizedRadius * 2.0) + 0.5;
// レンズ歪み
vec2 distortedLocalUv = getLensUv(localUv, vec2(1.0), uLensDistortion);
// レンズ歪みによって発生したUVの差分
vec2 localOffset = distortedLocalUv - localUv;
// ローカル座標から画面座標へ変換
vec2 globalOffset = localOffset * (normalizedRadius * 2.0) / aspect;
// 歪んだUV
vec2 distortedUv = uv + globalOffset;
// 円の中心から外側へ向かう方向
vec2 rgbShiftDirection = (localUv - 0.5) * 2.0;
// 色収差
vec2 texUvR = getTextUv(distortedUv + (rgbShiftDirection * 0.01) / aspect);
vec2 texUvG = getTextUv(distortedUv);
vec2 texUvB = getTextUv(distortedUv - (rgbShiftDirection * 0.01) / aspect);
float r = texture2D(uTexture, texUvR).r;
float g = texture2D(uTexture, texUvG).g;
float b = texture2D(uTexture, texUvB).b;
vec4 insideColor = vec4(r, g, b, 1.0);
// 円の境界を滑らかにする
float edgeAlpha = smoothstep(1.0, 0.85, maskDist);
// 円の外側の通常テキスト
vec4 outsideColor = texture2D(uTexture, getTextUv(uv));
// 通常テキストとレンズ部分を合成
gl_FragColor = mix(outsideColor, insideColor, edgeAlpha);
}実装はコメントに書いてある通りです。
これで円の中にテキストが入る際のレンズ歪み効果が実装できました。
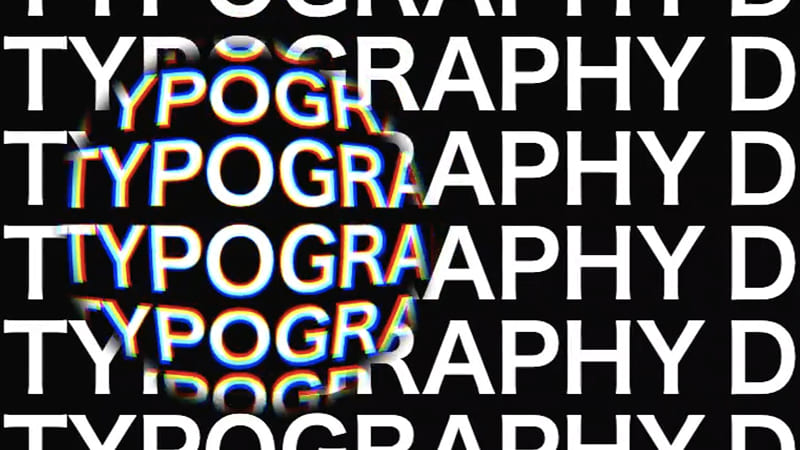
実際のデモとGitHubにあるコードでは、円に対し簡易的なモーションブラーを適用しているのと、一定時間が経過したら、ノイズを用いて無限ループしているテキストに対してuvをズラす表現を行っています。ぜひコードとデモを確認してみてください!
まとめ
Three.jsで跳ね返る円の中に入ったらテキストをレンズ歪みさせる表現の作り方を解説しました。実装の役割として、跳ね返る円はJavaScript側で制御し、背景のテキストの動きはシェーダー側で実装するなどが知れて良かったです。
Three.jsでのテキストの無限ループの動きや、円に入ってからのシェーダーの表現、レンズ歪みなどの表現が参考になればと思います。